|
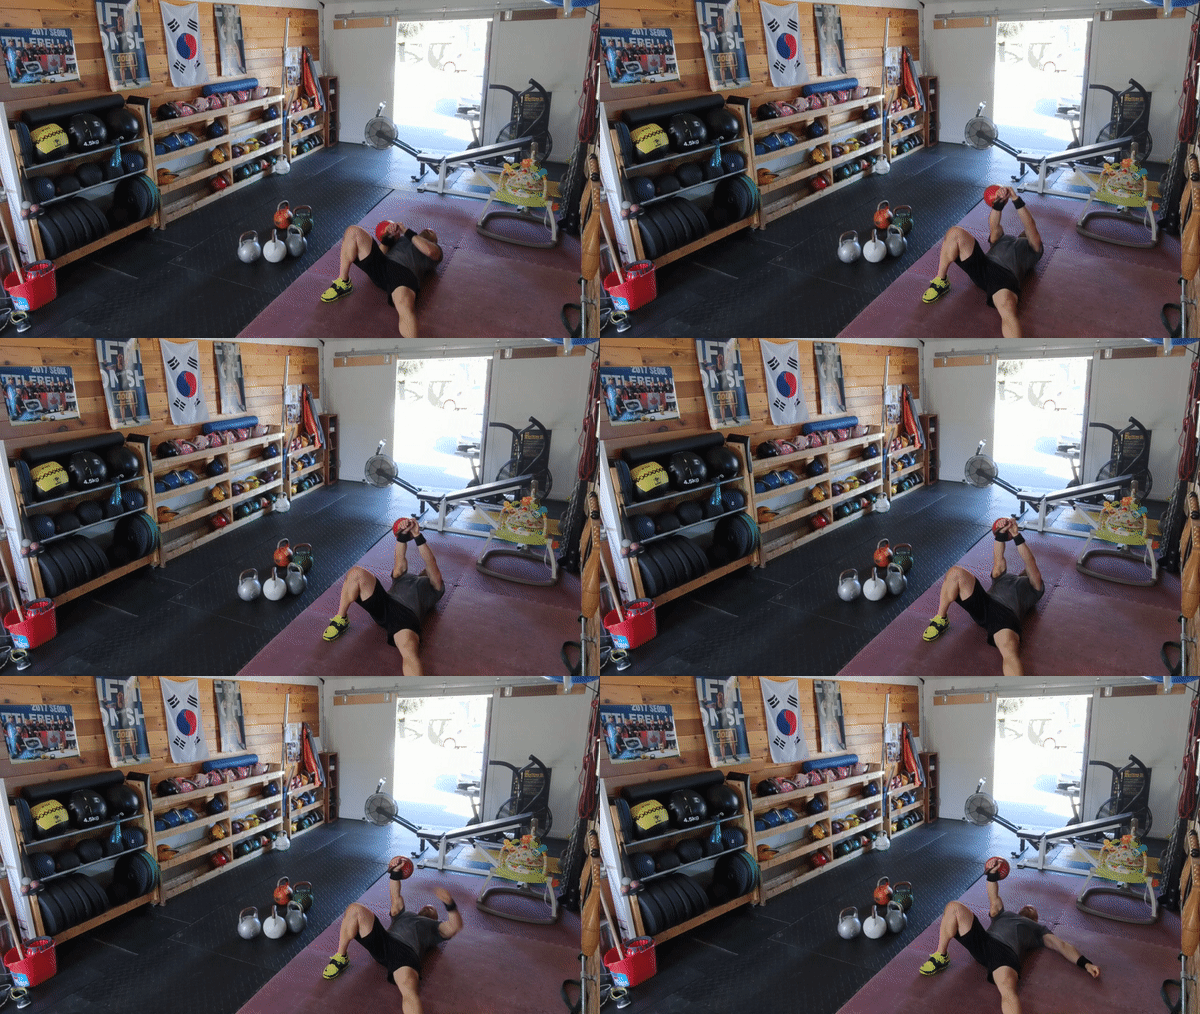
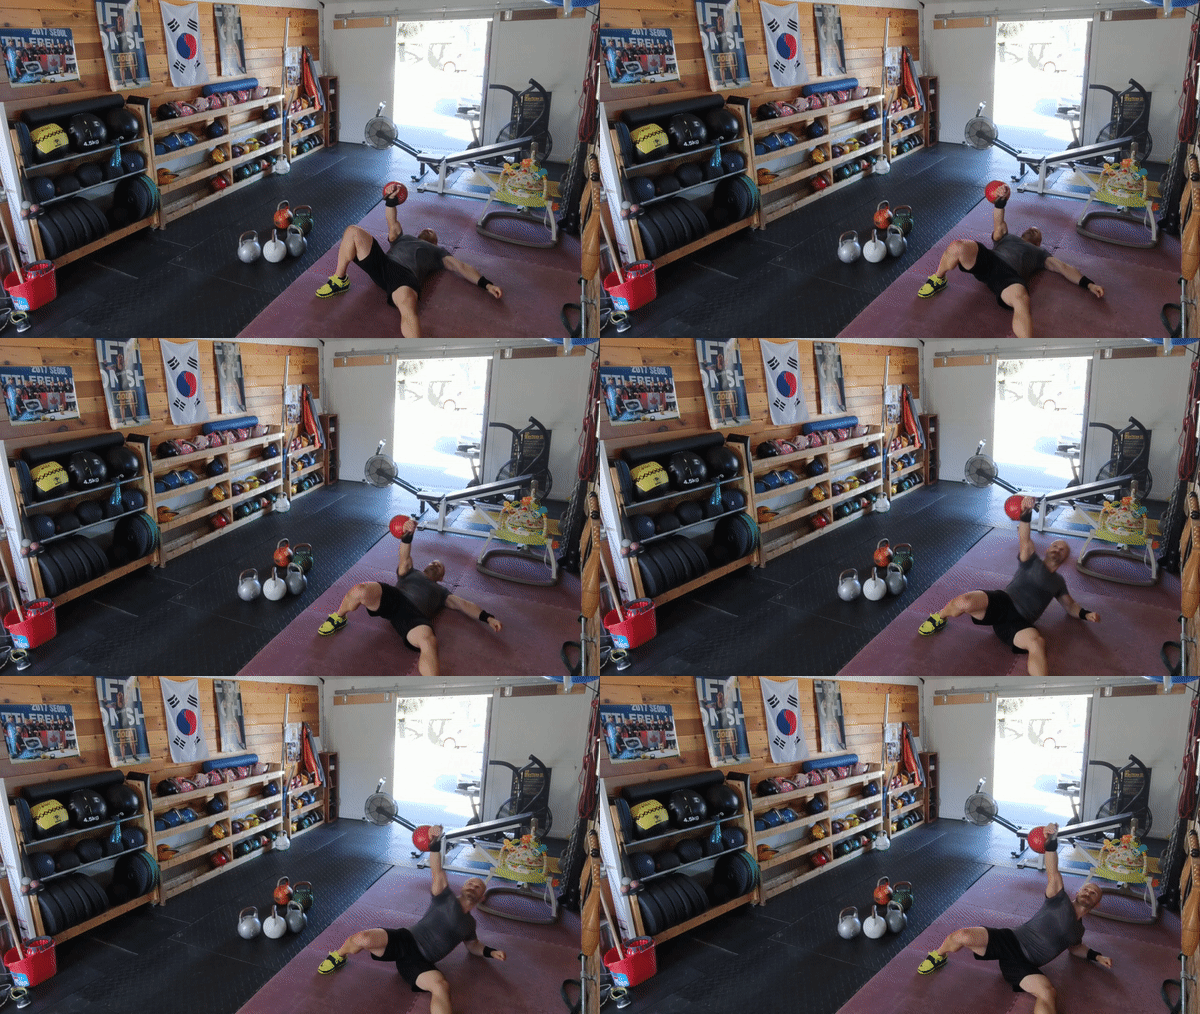
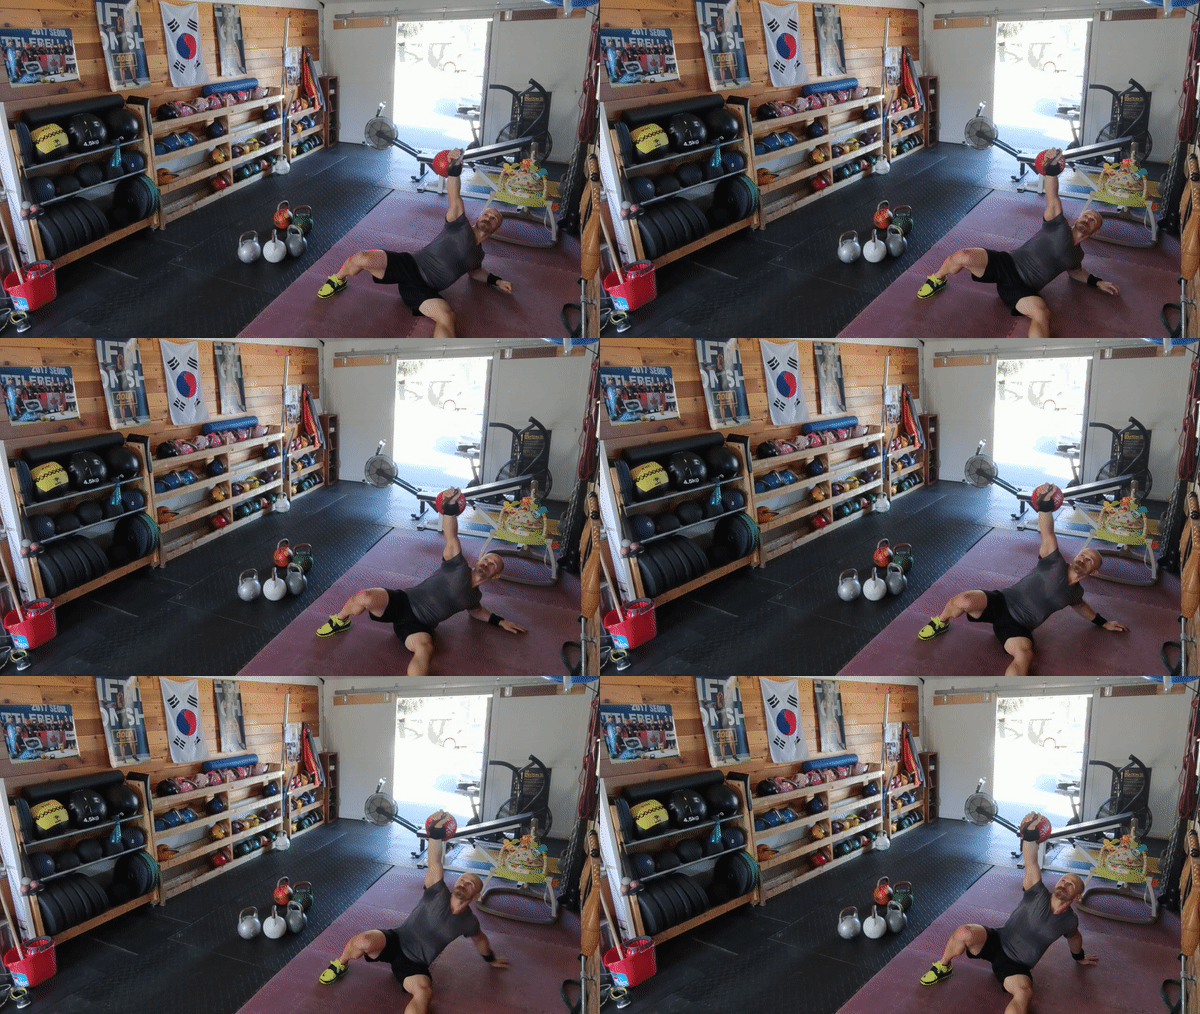
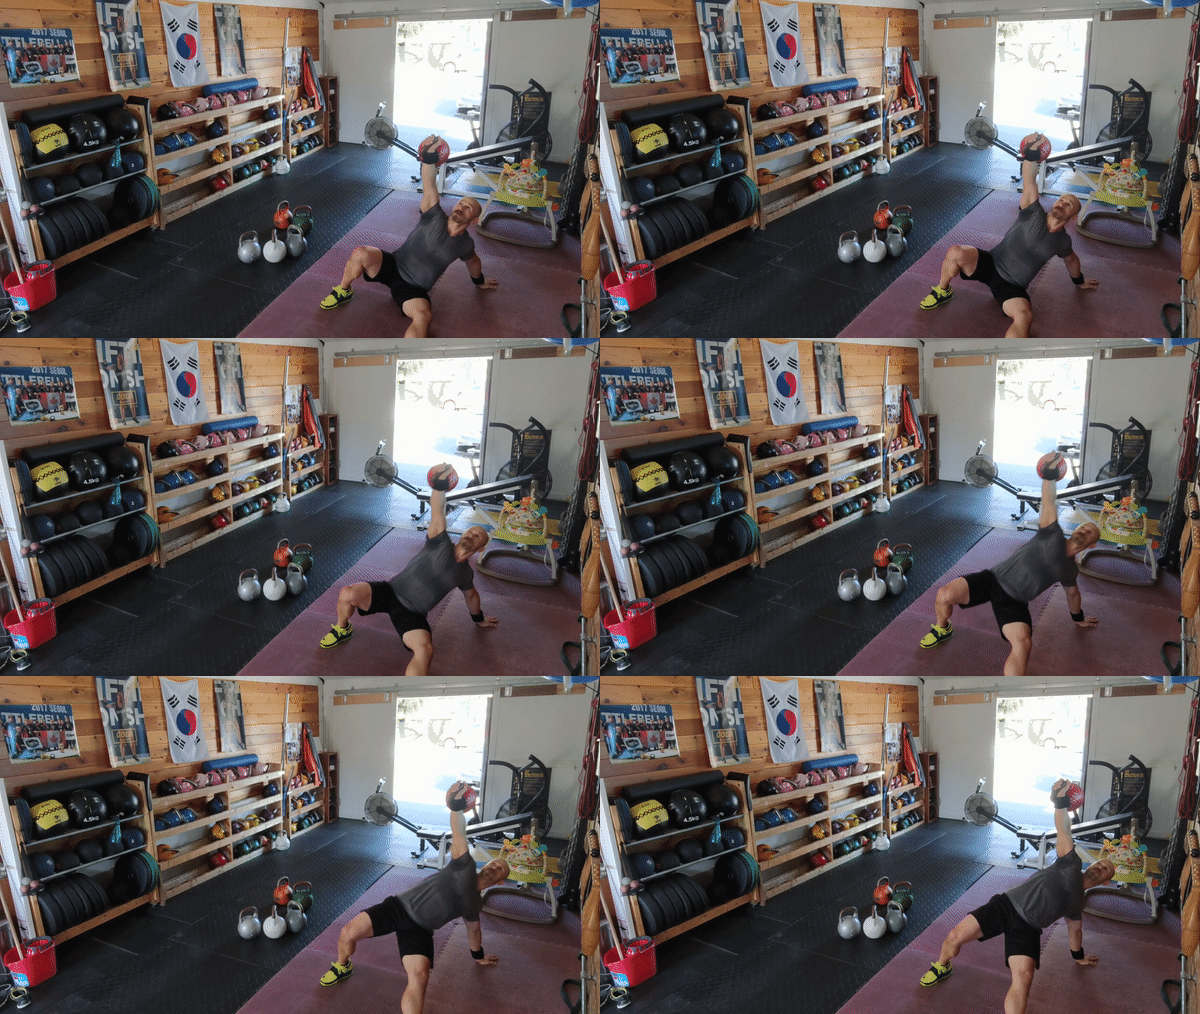
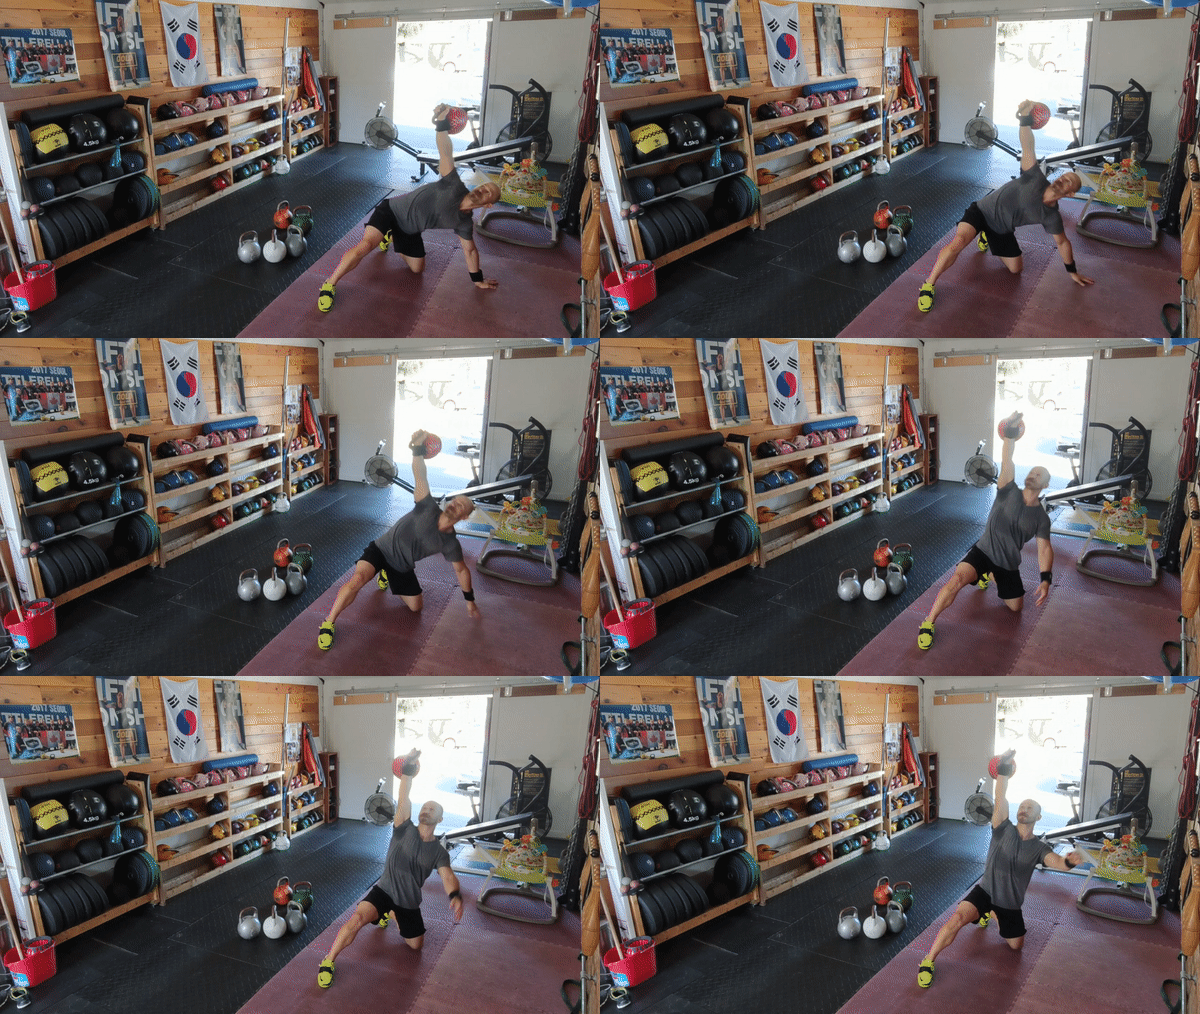
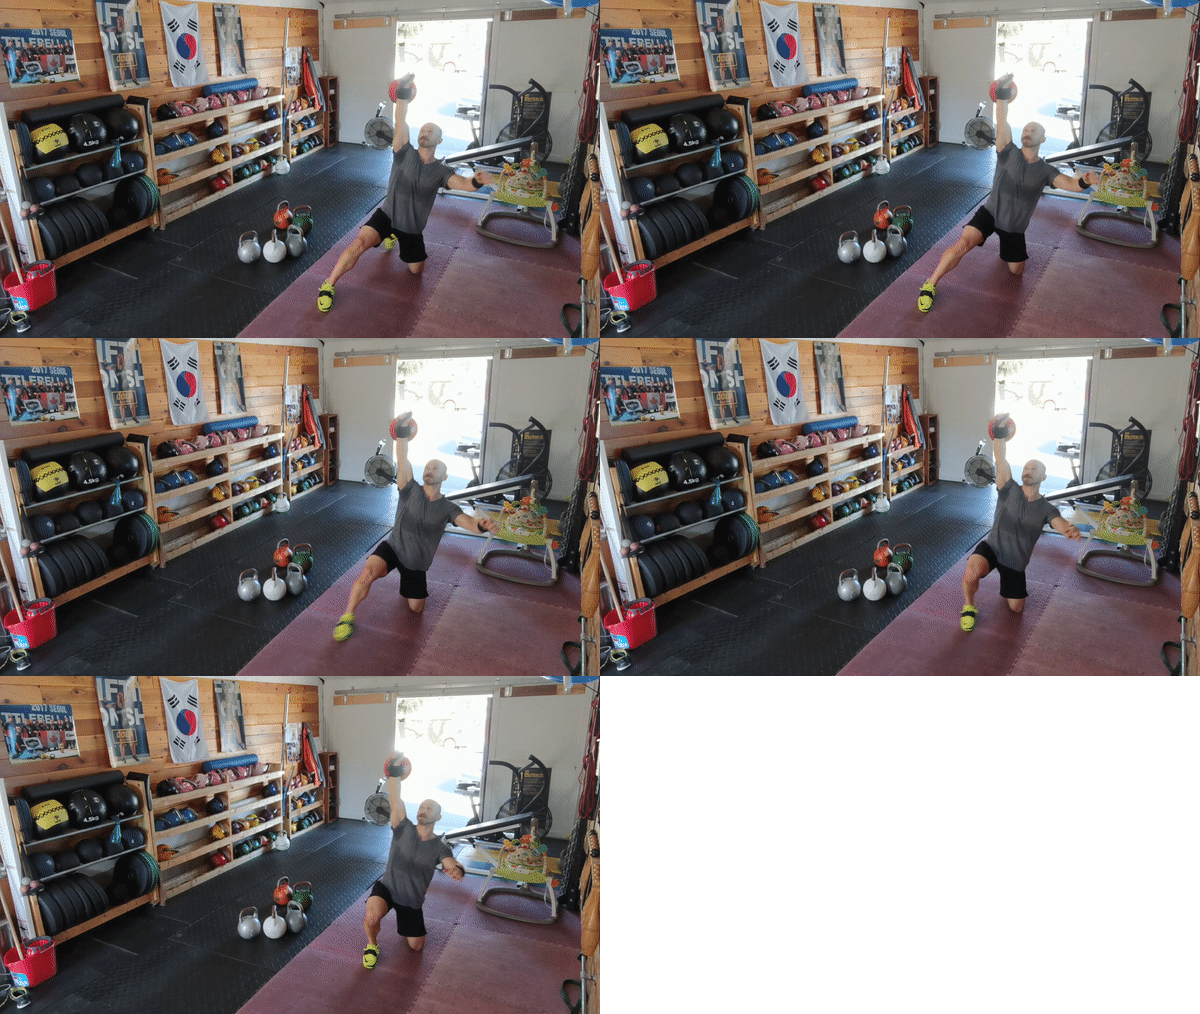
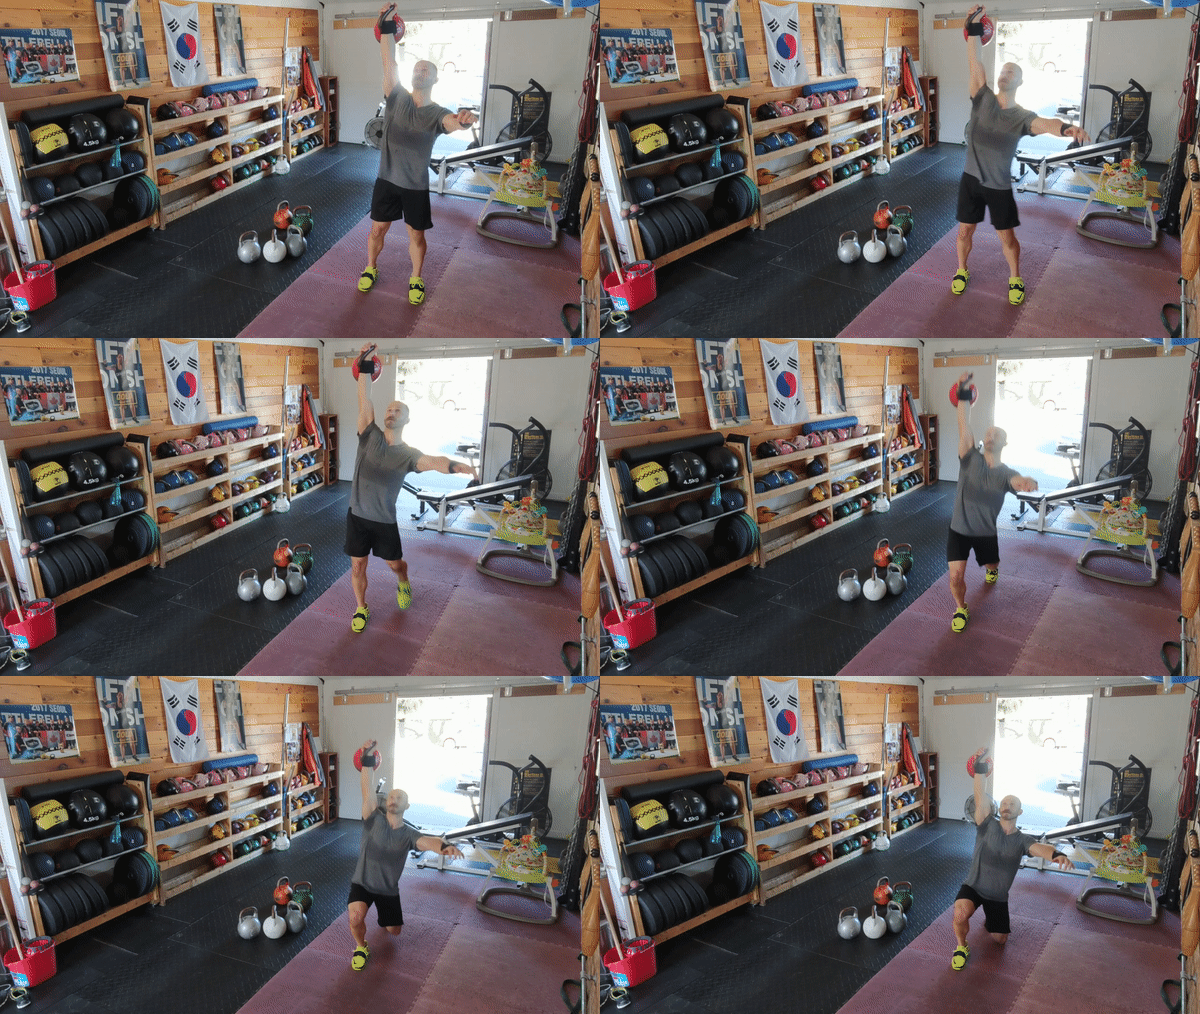
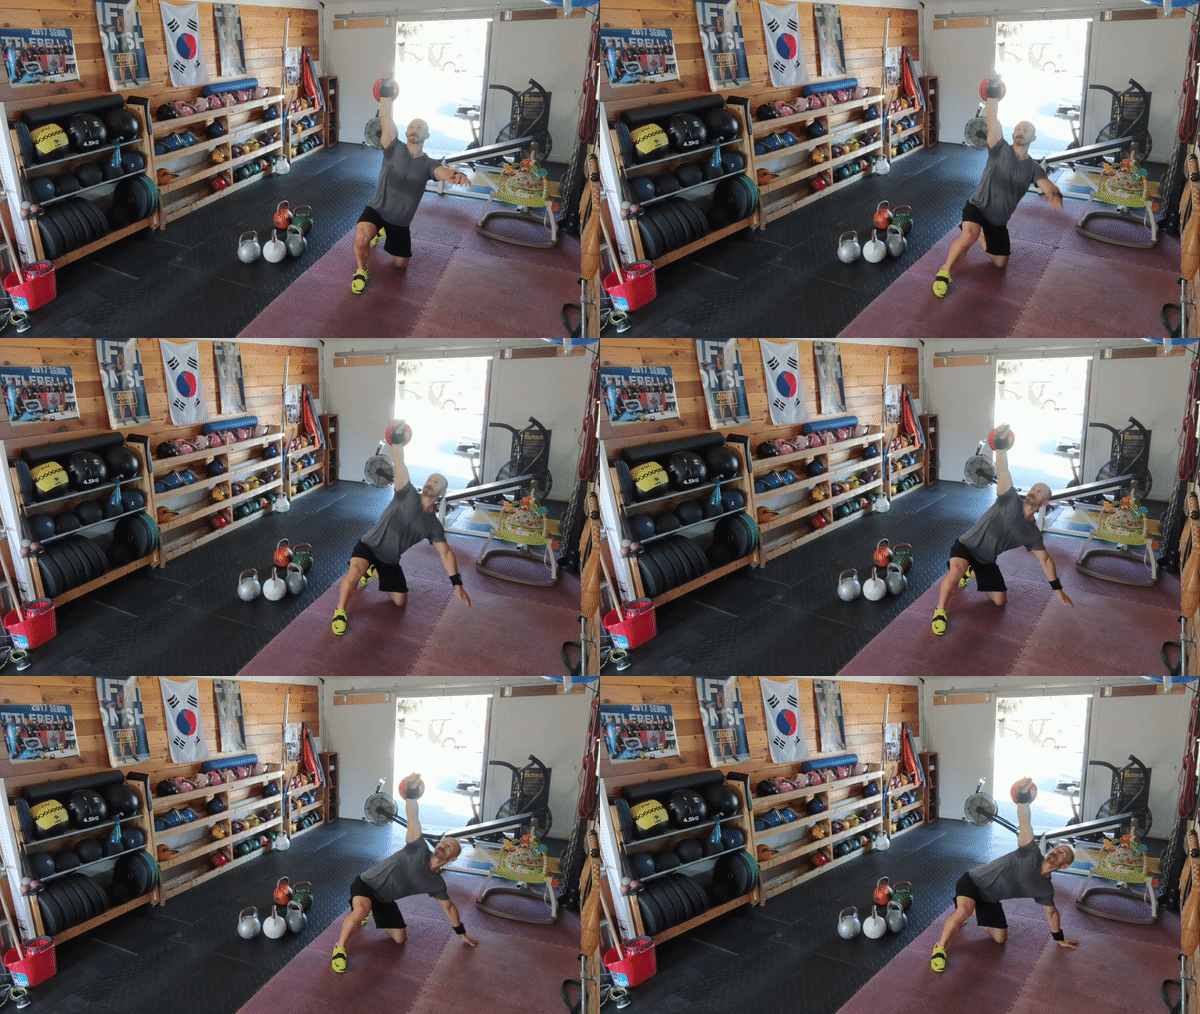
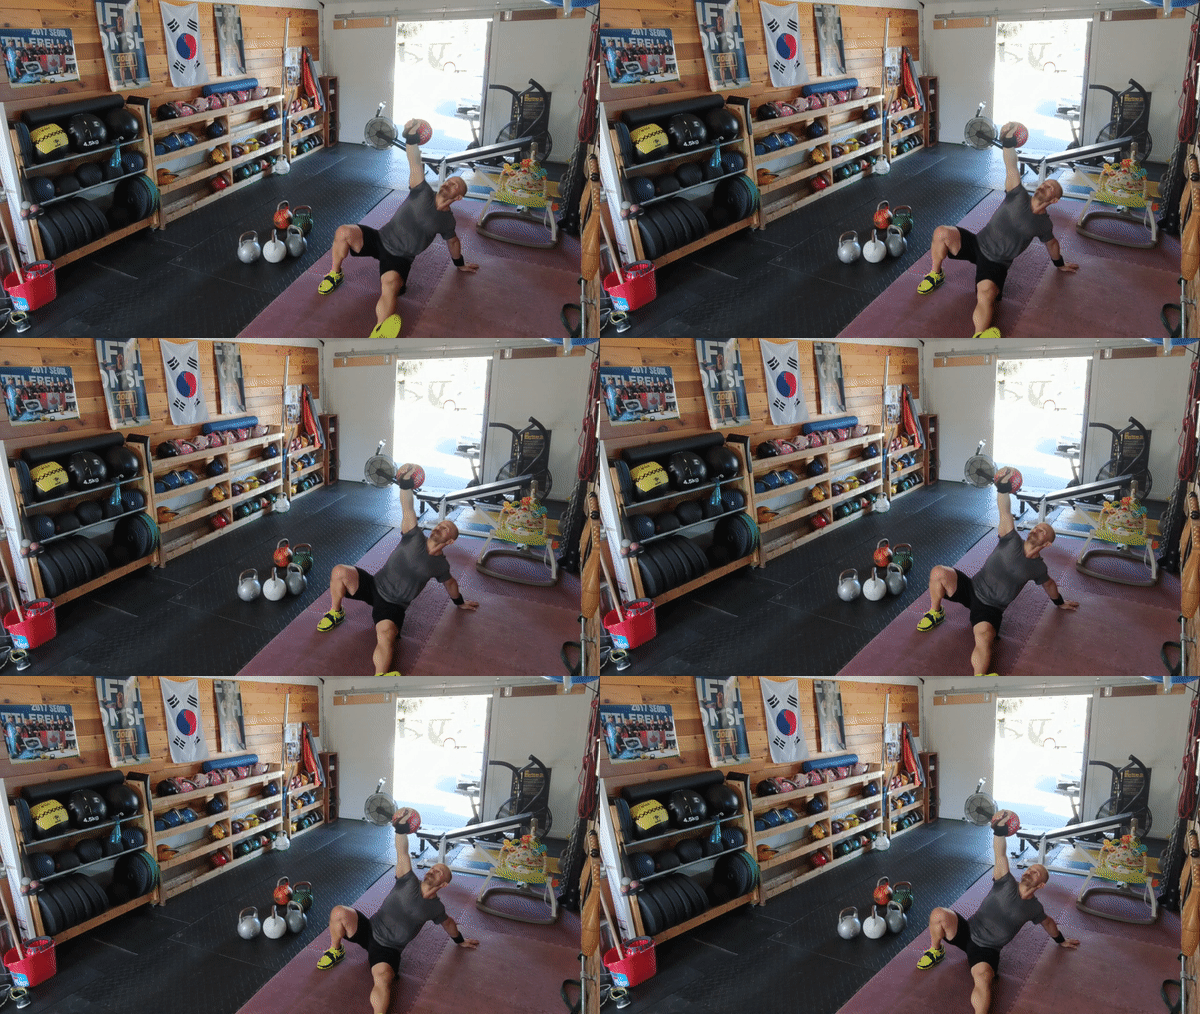
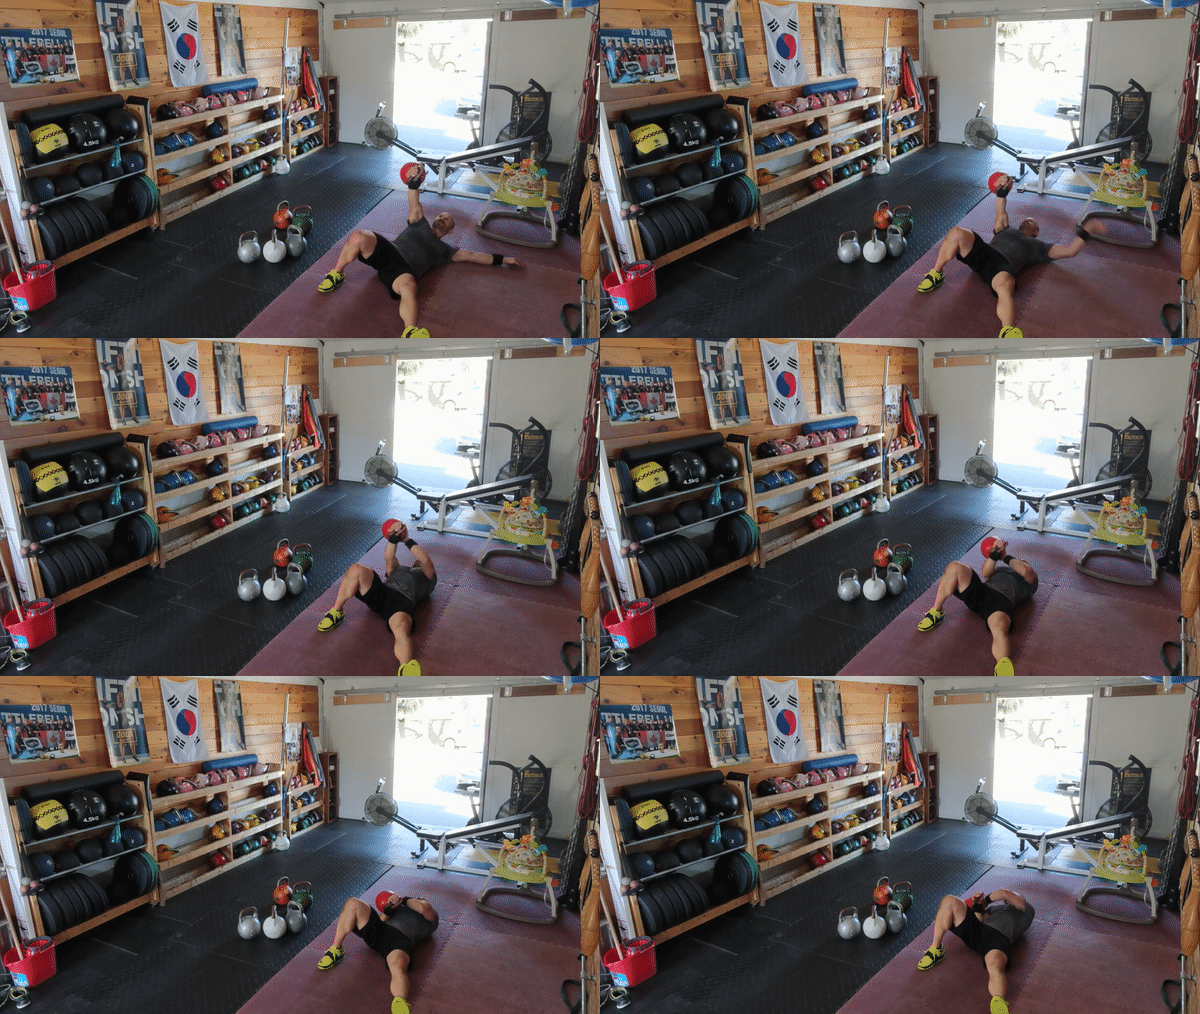
This exercise has been used as a quick assessment tool for movement quality because the parameters for both joint mobility and system stability lie at the upper boundaries of what is considered functional. When performed with increasingly heavier weights, there is a high neural demand on cognition and motor control. Thus, this exercise can neither be rushed nor performed without 100% focus. As renowned physiotherapist and FMS founder Gray Cook remarked, symmetry, bodyweight management, strength, and stability can all be addressed with the Turkish Get Up because despite not working many prime-movers, "[it] really blasts your stabilizers" and "stabilizers are what give you the mechanical advantage to be stronger". As the legend goes, if you wanted to learn how to lift you would find your local, village strongman and ask him to teach you. The strongman, knowledgeable in such matters understood that not everyone had the focus, determination, coordination or even physical well-being it takes to begin much less endure years of brutal training. In order to separate the wishers from the workers, the strongman would decree: "This is the Get-Up. You must perform it on both the left and right sides equally. When you can do it with 100lbs I will show you how to lift." The Turkish Get-Up truly is one of the most accessible ways to assess both quantitative and qualitative parameters of physical fitness. Not only will a TGU performed with light-to-moderately heavy weight keep you in the best shape of your life, but it also a mighty feat of strength when attempted with a maximal load. The Turkish Get Up includes both an ASCENT and a DESCENT. TGU: ASCENT STEP 1: FLOOR PRESS STEP 2: ROLL TO ELBOW STEP 3: POST TO HAND STEP 4: HIGH BRIDGE STEP 5: BRIDGE TO KNEE 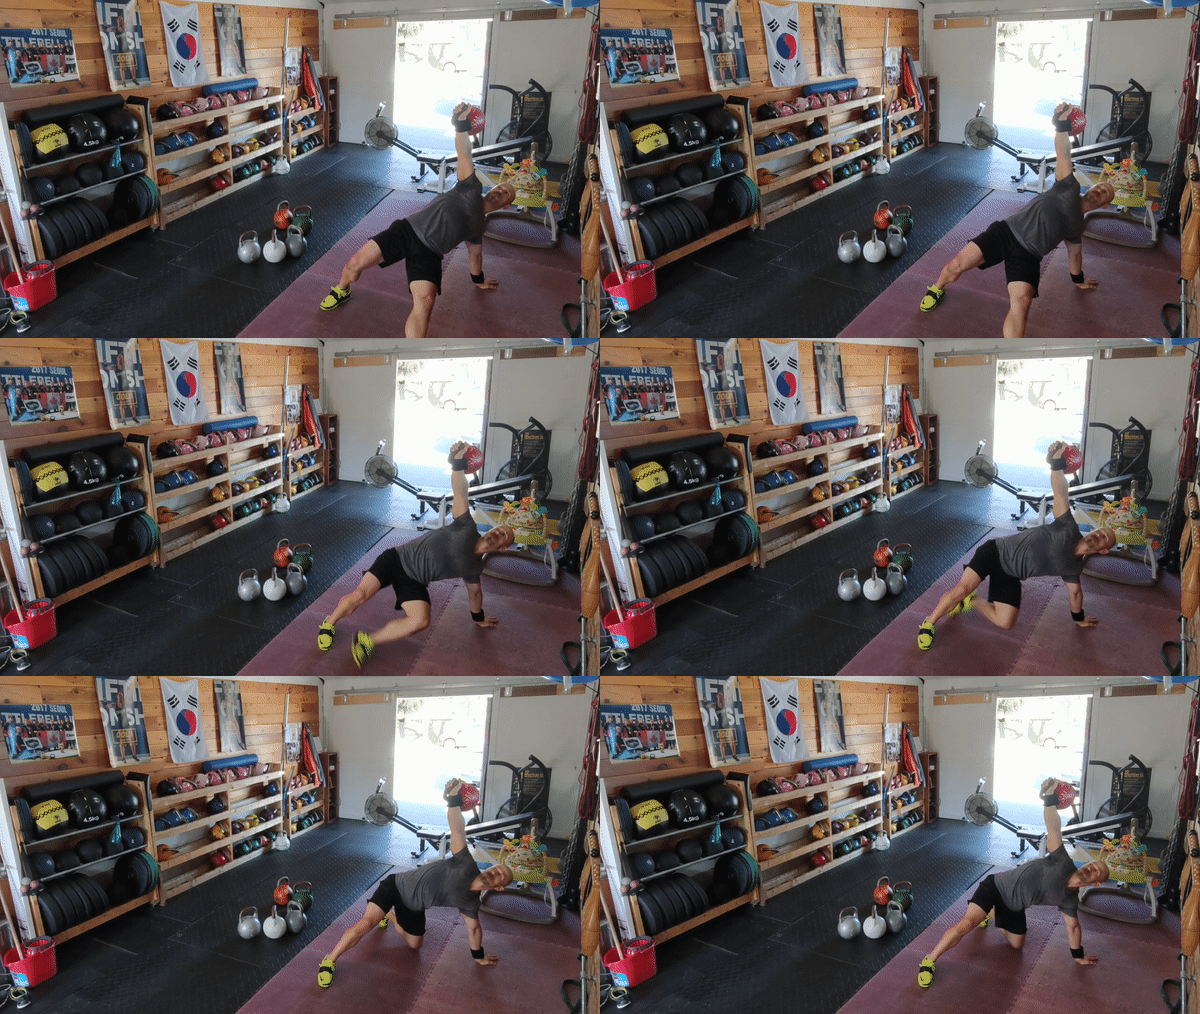 You are about to support yourself and the bell on only two points of contact - so be ready! Most of your weight is in your bottom arm here so take it slow and DO NOT take your eyes off the bell! Pull your foot underneath your body, slightly turning your hips to clear the floor with your knee. Plant the knee directly underneath your torso. If you have trouble running your knee into the floor, it's usually due to not turning the hips. STEP 6: HIP SHIFT STEP 7: ADJUST YOUR FEET STEP 8: KNEELING TO STANDING 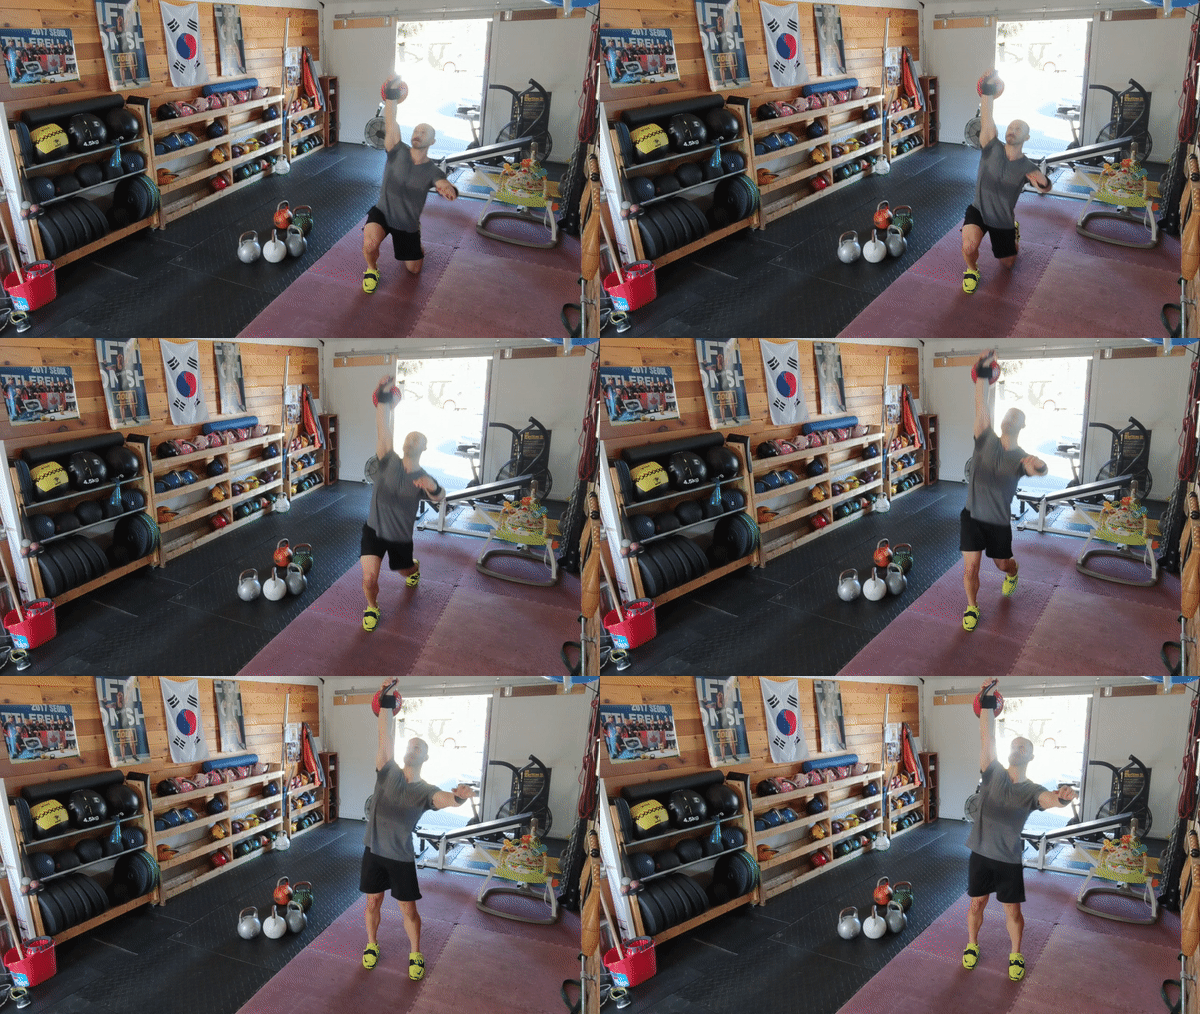 Don't get cocky! Keep your eyes on the bell, maintain active lockout, keep shoulder blade anchored, and PULL FORWARD into a bilateral stance. DO NOT push back into split squat stance and then step forward. The former utilizes your glute/ham strength and hip stability to ascend, the latter your quad strength and knee stability. TGU: DESCENT STEP 1: REVERSE LUNGE STEP 2: HIP SHIFT / POST STEP 3: SHOOT STEP 4: PLANT YOUR BUTT STEP 5: SLIDE TO YOUR SIDE 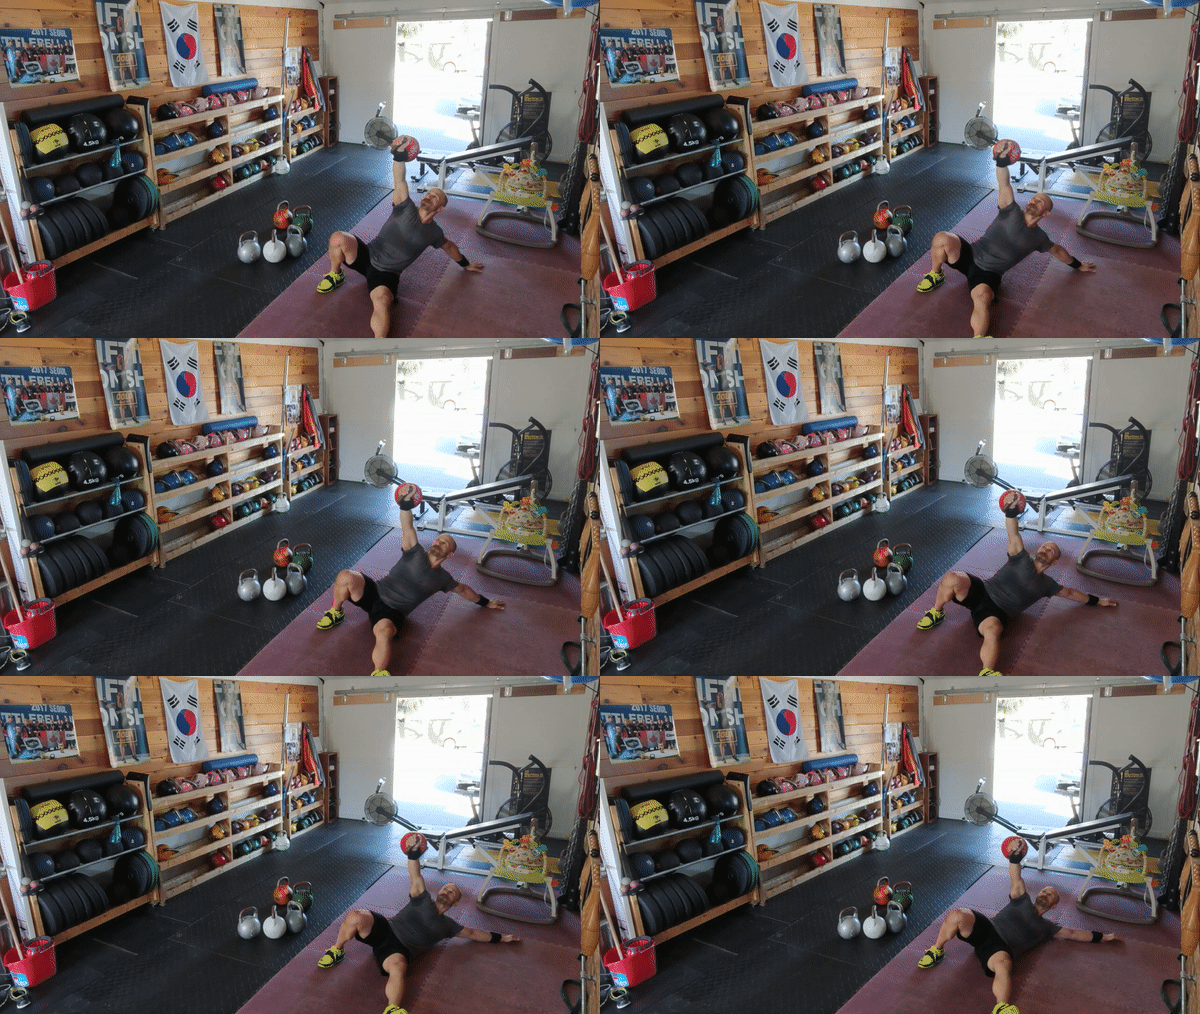 I have found this technique to be more reliable and predictable than simply reversing the ascending steps. Dropping to the elbow is not usually the issue, but rather getting to the back without dropping awkwardly or directly loading a flexed thoracic spine. Maintaining a stiff arm while sliding out allows a controlled descent at constant speed. People with poor shoulder ROM may have trouble with this step, but then again those people probably cannot TGU without a bent bell arm. STEP 6: ROLL TO YOUR BACK
1 Comment
|
NANAIMO'S BEST kettlebell group, strength & fitness classes | (250) 713-1262
CategOries
All
Archives
February 2024
|
Get Social! |
Closer Than You Think!11 Giggleswick Pl
Nanaimo, BC V9S 2V7 |


 RSS Feed
